This feature allows a clinical site to print a label to send a shipment to a laboratory. The clinical site must be able to print a label on a printer. The central laboratory must have enabled the feature and designated the shipping service level.
For more information about UPS Premier, contact your account representative or reach out to us.
Step 1: Access the UPS Healthcare® Lablink Page
- Scan the QR code or go to to access the UPS LabLink webpage
- Scroll to “More Options,” and select “Print Return Label.”
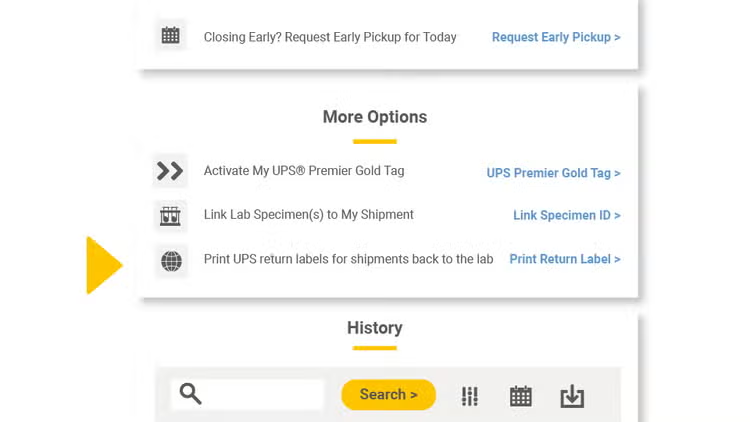
Step 2: Select the Label to be printed
- Available return labels will be displayed. Please note that there could be more than one lab available.
- Select the Lab to be sent the specimen.
- Click ‘Continue’.
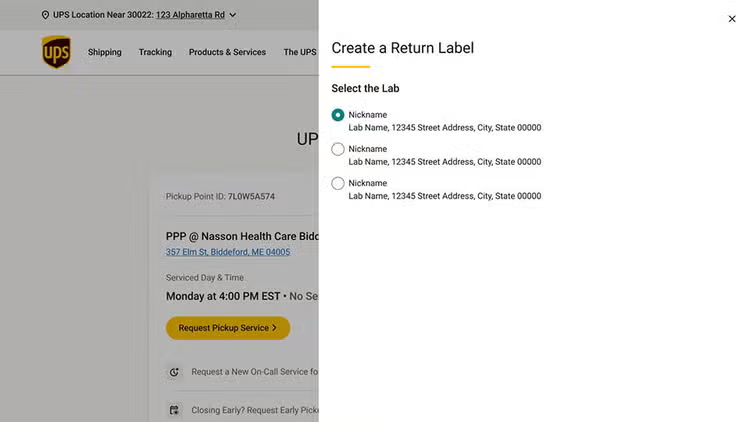
Step 3: Provide additional details about the shipment
- Additional details may be requested from the laboratory.
- Enter requested information if required.
- Create Return Label
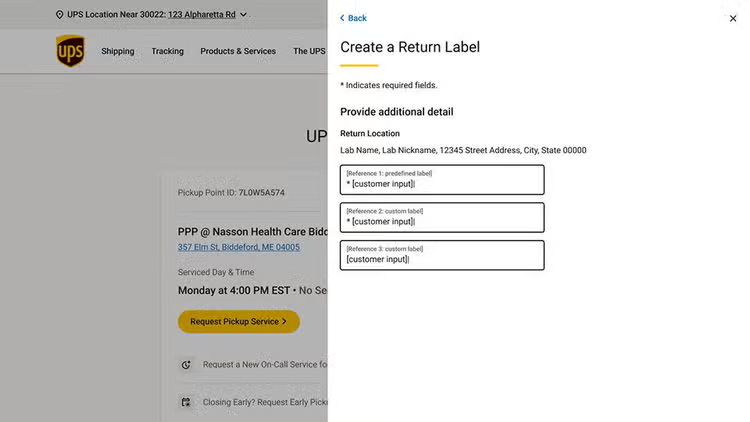
Step 4: Review and Payment
- Select “Print Return Label” and send it to your local printer.
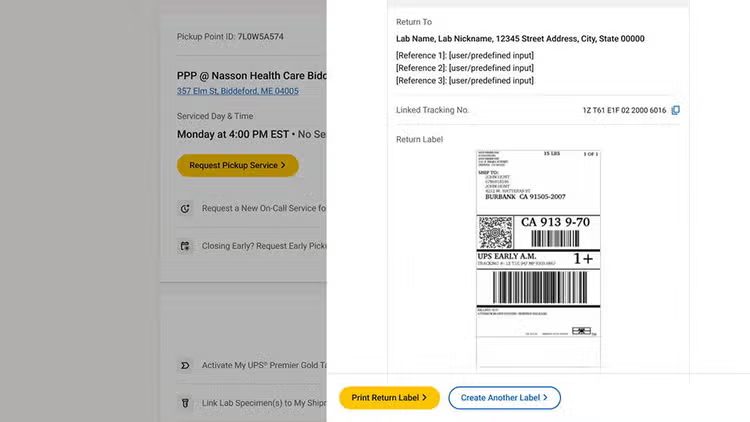
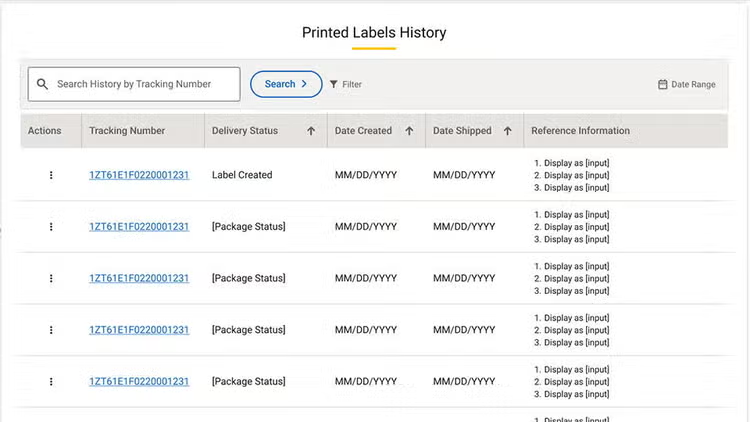
Step 5: Printed Labels History
- Labels generated will be displayed in the “Printed Labels History” section of Lablink.
- “Action buttons” allow the user to reprint or delete a label prior to being shipped.
- History shows date printed, date shipped, and status.
More Resources
Congratulations! You’ve successfully printed a label for sending specimens to the lab.
Want to learn more? Check out: